Front Room Progress
Friday, November 03, 2017
I can't wait to see this room with the board and batten around the walls! I've also been sourcing furniture to relieve my excitement and it's not really helping. Go figure Laura.
It's funny how it seems like we've only done a few simple things from these two pictures. But there has been so much mental energy and physical effort on the room already. Here's the run down of the process:
Choosing the Right Color
I'm not an interior designer by a long shot, but I did learn with the last house that when you make one wrong design decision it can have a snowball effect of bad decisions. We picked cream color cabinets in our kitchen remodel to save money and then we realized you can't really paint the walls grey when you have beige cabinets. Instead we picked a neutral we liked (the color was called Brandied Pears) but weren't in love with.
This time I knew I wanted a light grey that was more grey than beige. I was also really concerned about it lightening the space it was in because we were going to paint some halls that same grey that don't get natural light.
My other preference was to avoid "grieges" or grey-beige which are really hot. My personal style preference is "transitional" which is basically a more modern take on traditional and I felt like grey is a modern neutral option but it's more adventurous than the white wall trend I love too.
The scary thing about grey is it can read cold if you don't go the griege direction. I brought home a million paint chips and then gave up and turned to Pinterest for grey advice. I really enjoy the Young House Love podcast and Sherri gave a tip about looking up rooms that are painted the color you're thinking about. I was interested in a couple greys but felt like the pictures of Grey Owl by Benjamin Moore where they lightened the paint 50% were my favorite. Here are a couple:
I was a little scared Gray Owl can read too blue/cold but after looking at enough pictures, I realized the decor and the light of the room really determines how the walls will read. These rooms are super neutral but in rooms where there are warmer accents it looks really neutral. It's so light, it reflects the environment around it. Basically it's almost a neutral gray and it was close enough for me to commit.
Figuring out the Wainscoting
David drafted the new fireplace and built-in plans for our family room and it's going to be gorgeous. Like this family room will be my dream room. Sneak peak of that soon! I realized as I'm looking at all this more traditional wainscoting that it won't match the fireplace and built in design.
So we're going to go the board and batten route because it'll be a smilier style to the fireplace design. Here are some examples of what we're thinking, we still have to decide on the height and the exact board we're using on the top.
Taking Down the Ledge and Patching the Drywall
David surprised himself by what a flawless job he did patching the drywall. You can't tell there was ever a dust-collecting, pointless ledge on the wall.
He ripped off the drywall and cut down the supporting two by fours, leaving a ledge shaped gaping hole. Initially when I floated the idea of taking down the ledge, David really, really didn't want to do it. He was burned out from the huge amount of time-consuming drywall he did in the last house. But after I got a quote for someone else doing it he decided to do it himself. He was pleasantly surprised by how relatively easy it was which I was grateful for. He's the best!


Hardwood Install
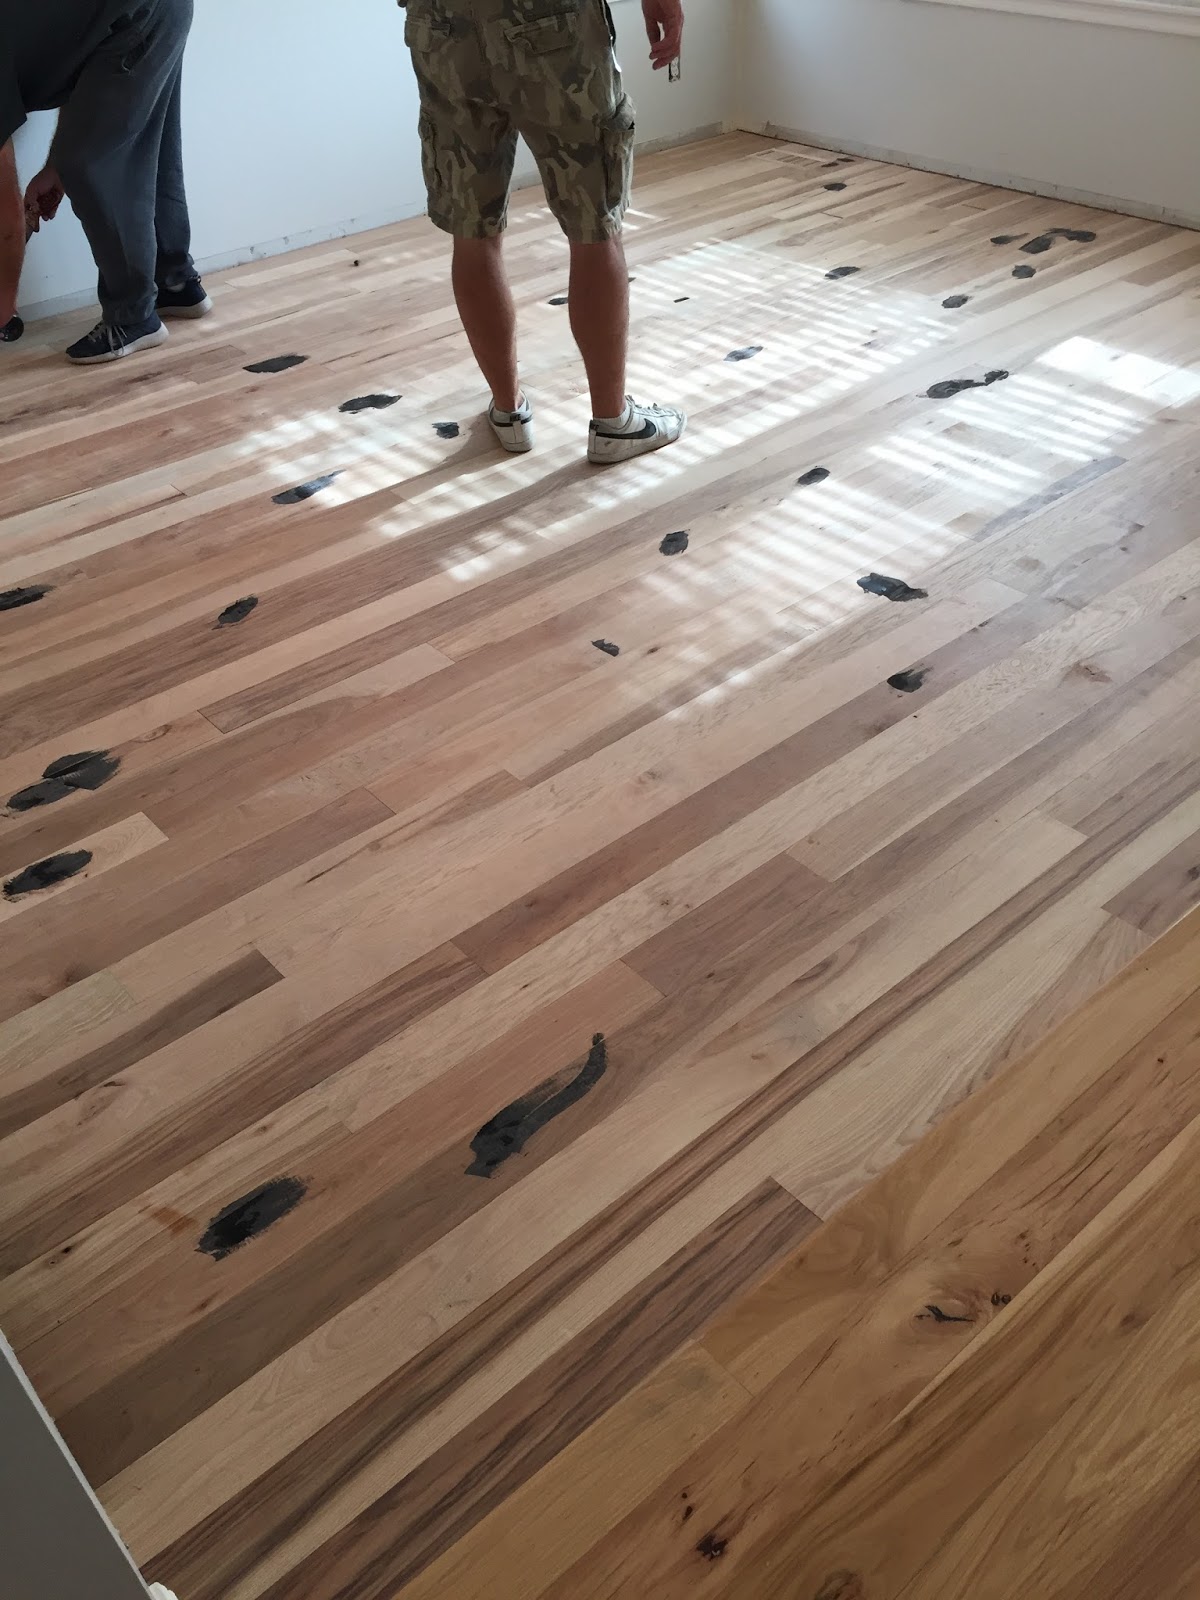
We decided to extend the hickory from the front entry and kitchen into the front room. I got three bids and went with Littlewood Flooring. If you're in Salt Lake County, I highly recommend McKay. He had the most competitive bid and the best reviews. He and his team did a great job.

It's a 3 day process. One the first day they cut and install the boards. David had removed the carpet and we had removed the staples in the sub-floor to save the $100 removal fee. The wood was delivered a few days before install because it needs to adjust to your house/humidity.

At the end of the install they filled the knots in the wood with this black stuff to make it level and make the knots really pop. The install took probably 5 or 6 hours.

The next two days were the worst. It's unavoidable that the finish smells super strong and you won't want to be home because of that. Taking a toddler out of the house for hours on end is not that fun to me so... yeah. But worth it in the end. They sand the floor and apply the finish and come back and do it again the second day. It's so pretty and I'm so glad we did it now. Especially because it would have meant hauling a toddler and baby around for hours if we waited a few months.
I'll keep you updated on this room and the next project that's already in progress!!


0 comments